Blogging is one of my favorite “growth hacking” methods. It lets you share your thoughts and separate yourself as a leader in your field. Blogs also help you build your email list, which you will learn is going to be one of your biggest business assets. Fortunately for you, creating an income generating WordPress blog doesn’t need to take long to get started. Here is how you can get one up and running in just 24 hours.
You will, of course, need to continually create great content (and plenty of “evergreen” content), but this process I am about to share with you is going to help you create a hub for your content that is optimized for traffic and a place that you will actually want to write.
Remember: You can change any of this later on! Logo, blog title, hosting etc. Don’t wait to start, just freaking start!
Step #1 Pick a Niche
Your niche should be a combination of something that interests you and something that makes money. If your topic fulfills only one of these, it isn’t a good money earning/brand building blog.

If you want a hobby blog and aren’t looking to monetize, go for it, but EntreResource.com is about helping you make money.
Step #2 Choose a Domain and Site Name
It doesn’t matter what it is, just keep it short and relevant to your topic. Also, I recommend good old fashioned “.com” over anything else.
My favorite tool for finding domain names is LeanDomainSearch.com It is free and will give you hundreds of ideas.
There are plenty of guidelines and best practices for choosing a domain name, but for now, pick something and get moving.
Your blog needs a name. Not just any name but one that will resonate with your audience.
You don’t have to make it catchy or cute; just name it something simple that’s easy to find online. The name also needs to attract your target audience (more on that in a bit.)
Keep the name short. You can have up to 26 characters in a domain name, but you don’t need to use them all.
Including keywords in your domain name is a good practice, if you can make it work.
The main thing to keep in mind is how the name reads. Is it easy to pronounce? Do people know what it is when they see it?
Be careful that your domain name doesn’t create some weird phrase when you write it out.
Here are a couple examples of what not to do:
- choosespain.com – Choose Spain
- kidsexchange.net – Kids Exchange
If you’re stuck, here’s a suggestion, use your own name. People may not know who you are now, but they will. That’s what I always say anyway.
Try out these name generators to get more ideas:
Additional Resources
- 8 Rules for How to Choose a Domain Name by Rand Fishkin
- The 8 Best Blog and Domain Name Generators by Jamie Spencer
Step #3 Buy Hosting (and Domain)
EntreResource runs on WPX Hosting, and it is all that I currently recommend (it will come with a domain as well).
You can read my full review of why I left hosting providers like WP Engine, BlueHost, and others in favor of WPX below. In the meantime, you should consider getting a managed VPS hosting for a better server management.
Step #4 Install WordPress
WordPress is the only thing I recommend blogging with. It is free, and you can find how to install it easily inside the hosting provider you pick.
If you purchased WPX Hosting, installing WordPress is very simple.
Here's why you want WordPress...
- FREE
- Responsive
- Integrates with your social media platforms
- Easy-to-use (Update and Edit)
- SEO ready
- Upgradeable
- Scalable
The reason WordPress is free is that it’s open-source, which means developers create the code and make it free for anyone to download and use.
Step #5 Pick a Free Theme
A theme is a collection of stylesheets, graphics, fonts, and colors that determine the look of your blog.
You have a choice when it comes to themes. There are free themes and paid or Premium themes.
When you’re more serious and realize you’re in it for the long haul, I recommend that you check out Thrive Themes.
Step #6 Install Basic Plugins
There are thousands of different WordPress Plugins, but there are only a couple that I feel are necessary right out of the gate.
- WordPress SEO by Yoast -> This will help simplify the SEO process. You are new to blogging so you need all the help here you can get.
- Backup Buddy -> There are other backup tools, but this one does a fine job.
- W3 Total Cache -> Speed up your site with this cache tool
Be sure to not overdo it with plugins. You will be tempted to install everything under the sun, but it can quickly weigh your site down and hurt you performance.
Step #7 Get a Simple Logo on Fiverr or Design Your Own
This part doesn’t matter much yet. If you don’t want to do it, don’t, but it doesn’t take long. If you want a premium logo (recommended later) you can check out 99 Designs, but for a weekend blog, don’t worry about that yet.
Additional Resources
- Logo Design for Newbies: How to Create a Simple Logo in Adobe Illustrator (if you choose to do it yourself).
- Logo Inspiration: 350+ Simple, Smart Logo Ideas And Examples
Step #8 Create Your About Page
Before you write any articles, you need an about page.
Additional Resources
- How to Make the Perfect About Page by Neil Patel
- Are You Making These 7 Mistakes with Your About Page? by Sonia Simone
Step #9 Research Your Competitors and Brainstorm Article Ideas [2 hours]
Don’t worry about anything more at this point than coming up with the best blog topics. Make a huge list of them and decide which would be the best and most valuable to your audience.
Additional Resources
Step #10 Start Collecting Emails [Immediately!]
Do not wait to start collecting emails. I spend quite a bit on my email marketing tools, but you can get started for free.
So many people screw up and start putting side bar ads instead of grabbing emails. Reality –> You aren’t going to make much money on ads on a new blog, but emails will make you money far into the future.
I use…
- ConvertKit (How I send my emails)
- SumoMe Pro Version (Pop-Ups)
- Snip.ly (Bonus opt-ins on curated content)
- Opt-in Monster (Side bars…I don’t like the ones from ConvertKit)
- Zapier (Various integrations)
BUT YOU ONLY NEED THESE TWO…
- SumoMe (free version for collecting emails)
- Mailchimp (free emailing software for first 1,000 users) or ConvertKit if you want to pay something for a better service (highly recommended, but later)
Step #11 Create a Bribe to Subscribe to Entice Email Opt-Ins
Set up your email opt-in first, but before you write any articles, create a killer bribe to subscribe.
People don’t just sign up for newsletters anymore for the heck of it. You need to earn them, and the best way to do this is by giving them some juicy, irresistible, free content.
This can be a report, ebook, video series, downloadable tool, or anything that you can give digitally.
Additional Resources
Step #12 Install Your Analytics and Tracking Codes
Search Engine Optimizatoin (SEO) is how you get your blog found by the people who are searching for the content you’re creating.
Without readers, your blog won’t be seen by anyone. Getting readers to see your content is the goal of Yoast SEO.
After you set up your free, Google Analytics account, go to Admin, from the Home screen.
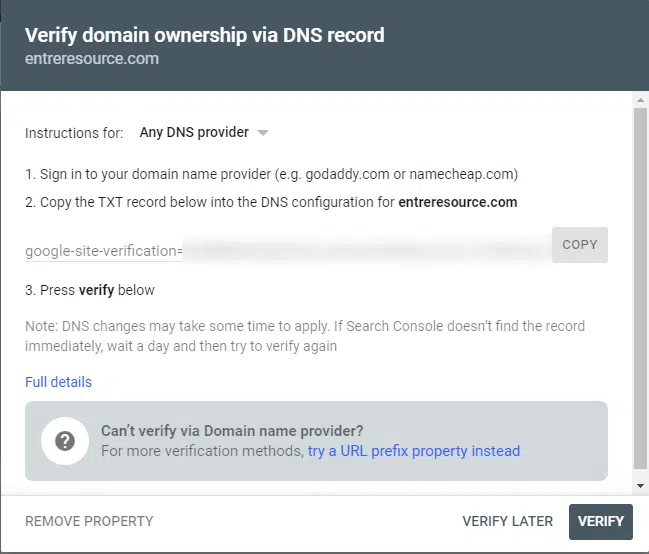
: If you see a warning message about changing your DNS settings, disregard it. Adding the TXT record won’t damage your website or DNS settings.
Once the Admin window opens, look under Property and click Tracking info and then Tracking Code.
Copy your tracking code and then go back to your website, so you can paste it into the correct spot.
From your (1)Dashboard, click (2)Thrive Dashboard > (3) Theme Options > (4) Analytics/Scripts > (5) Paste your tracking code from in the Header script area.
Your tracking code is now set. Let's alert Google that you have posts ready to be indexed.
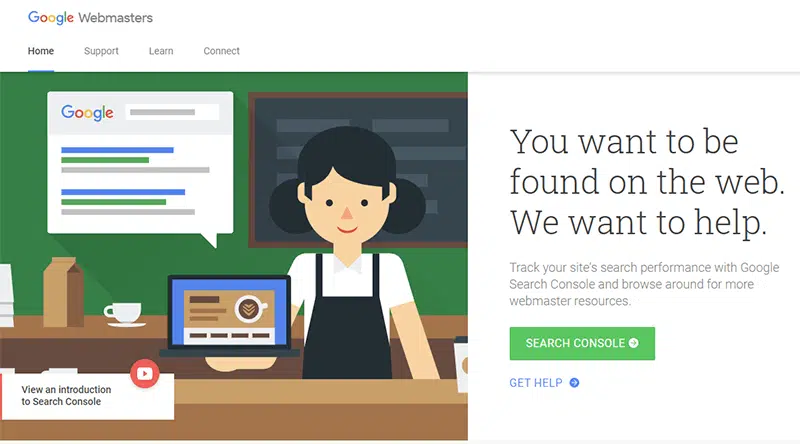
By setting up a free Google Webmasters account, you are allowing Google to search your blog and serve those posts to viewers.
Log in and add your property, your website URL.
After you add your website, you will be asked to select a Property Type.
Once you enter the required information, you will see the verification window below.
Copy the TXT record and follow these instructions: (per Google)
- In a second browser window or tab, sign in to your domain host account. For details, see Identify your domain host.
- Go to your domain’s DNS records. The page might be called something like DNS Management, Name Server Management, Control Panel, or Advanced Settings.
- Select the option to add a new record.
- Add the verification record to your domain host
- For the record type, select TXT.
- In the Name/Host/Alias field, enter @ or leave it blank.
Your host might require you to enter your domain, which looks like yourdomain.com, into this field. Your other DNS records might indicate what you should enter. - In the Time to Live (TTL) field, enter 86400 or leave the default.
- In the Value/Answer/Destination field, paste the verification record you copied in step 1.
- Save the record.

Once you've completed the steps, you will see a message that your ownership for this property has been verified.
Step #13 Create Your Social Media Presence
You won’t have a significant number of members for awhile, but you should create AT LEAST a Facebook fan page.
There are other mediums, of course, and it is up to you which you pursue the most. I like Facebook, YouTube, Instagram, and Pinterest (in that order).
Twitter is dead to me, and I know I need to get on Snapchat, I just haven’t.
Depending on the platform you use, one post won’t do. You’ll need to create a strategy of what to post when. You also need to know which types of content will work for a particular platform and what content works for you to produce.
- Facebook: Text posts with links back to your blog, graphics, photos, videos, LIVE streams, Watch parties, and curated content
- Instagram: Stories, high-res photos, quotes, and videos
- Twitter: Graphics, videos, LIVE streams, curated content, and GIFs
- LinkedIn: Graphics and videos that are targeted to Professionals, company and brand news
- Pinterest: Step-by-step tutorials, Infographics, videos
When you think social media, video often comes to mind. You can cover so much ground with video. Some people learn quicker by watching a video. Plus, you can strip the audio out and convert that into an audio post or even start a podcast by posting the audio to iTunes.
What types of video can you create?
- Tutorial on how to do something listed in your blog post
- Review what your blog post is about and why it’s necessary for your audience to read
- Take one point from your blog and expand on it
Post your videos on your YouTube channel, Facebook page, Twitter, Instagram, Instagram Stories, Pinterest, and LinkedIn. The videos can all be the same size, except for Instagram. Those videos will have to be resized since they use “square” videos and tall, rectangle-sized videos for their Stories platform.
Step #14 Start Writing Articles!
If you don’t get any articles written but do everything else above, that is a win in my book.
I recommend that you start writing in Google Drive (Google Docs technically, but they are stored in Google Drive). This makes saving, sharing, and editing accessible from any computer with internet.
Here are some tips for blogging productively...
1. Create a Blog Schedule
Now that you know how long it can take to create a blog post, set aside time on your calendar to write your posts.
You don’t have to write posts one at a time. You can break it up into parts.
- Generating ideas and research
- Writing
- Proofing and correcting
- Creating images
- Posting and setting up SEO
- Promoting
After you’ve written a few posts, you’ll have a better idea of how much time each post takes to complete.
2. Batching
Batching saves you time. This is when you do similar tasks together or do the same task multiple times.
For instance, you could research 2-3 posts in a single session. Or create the featured image for more than one blog.
Set aside 2-3 hours to do one task, take a break, and then move to the next task.
3. Work When you are Most Productive
I’m a morning person. When it comes to writing, I am most inspired in the wee hours.
Other tasks like research, image creation, and setting up posts are done in the afternoon.
Whenever you feel you can be the most productive is when you should do the work that takes the most brain power.
4. Use Trello
We use Trello, here at Entresource, to keep track of post ideas, posts that are in production, and completed posts. We move the items between the Trello boards, so we can all see who’s where in the production cycle.
Trello is a great tool to start helping you organize your blog posts and promotion tasks.
5. Automate Postings
No one has time to post on social media all day. This is another place where you can batch.
Set aside 2-3 hours to create your social media posts and then set them up using a platform like Buffer that will schedule them automatically.
6. Hire an Intern
There are certain tasks that you, as the blog owner, must do. But there are other tasks like posting, adding tags, uploading, and even researching, that can be done by someone else.
Bring in an intern to do those “Non income-producing” tasks.
6. Hire a Virtual Assistant (VA)
Interns are great, however, you’ll have to teach and work with them for a certain amount of time before you let them loose on your blog.
On the other hand, Virtual Assistants are professionals who can hit the ground running and start lightening your load right away.


Pretty awesome and very detailed. How relevant are the techniques mentioned in 2019?
Wow! Cool post. You make a nice post. It will help us a lot. I want to say thank you very much 🙂
I’m glad you liked it and I hope that it helps you make something great in 2018 🙂