We're all familiar with the phrase "Short Term Content". These are the short, vertically filmed video clips designed to run on loop.
You see them in TikTok videos, Youtube Shorts, Instagram Reels, and all major social media platforms. The one thing you may have noticed in many of these videos is this little logo that plays at the end of many short term video clips.

That logo means that that the people behind those video clips used the CapCut app for their video editing, and they probably have the unpaid version. One of the beautiful things about that app is that it is mostly used by everyday people who can make really great edits thanks to this app! That is why I felt like making this post. Everyone deserves to know how to make the best edits possible, and that starts with understanding how to use each of the most popular features.
What Is CapCut?
CapCut is a video editing app that uses templates as well as an extensive catalogue of editing features and crowdsourced templates. When combined, you can use all of the app's features to make really cool videos with little to no editing experience. I have seen tons of videos rake in millions of likes using just this app! Here is example of one video clip on TikTok that gained nearly half a million likes in just a few days!
Edit: The video now has nearly 1 million likes! Wow!
@laceyyyyc And if he doesnt sing this song I might cry. #superbowl #chiefskingdom #chiefs #nfl #superbowl2024usher @Usher Raymond #CapCut ♬ Yeah! (feat. Lil Jon & Ludacris) - Usher
This TikTok user @laceyyyyc was used CapCut to make a really simple edit on TikTok that gained over 900K likes and millions views as of writing this! The crazy part is that this was just done with simple templates and TikTok audio. Now let's look at another example of what your short form content can look like using CapCut's more sophisticated features.
Here is an example of a video made by CapCut's own professional editing team using just CapCut.
@capcut New feature Lock-On is released! No more manual camera movements, just one-click and say goodbye to sore muscles 😏 Upgrade to the latest version to try it out! #capcut #videoedit #cccreator #viral #fyp #tutorial #lockon ♬ 原创音乐 - CapCut
This one was made by CapCut's marketing team to help advertise a new feature in their app called "face lock", which we won't cover today. As you can tell, this edit is incredible and just shows all the awesome stuff normal people like you and I can do in this app.
Wether you are making tailored content for some market niche, or you are just making silly videos on TikTok for "internet points", CapCut will be your best friend to accomplish this.
Downloading The App
CapCut is an app available on Desktop, PC, Mac and most mobile devices. In my opinion, if you want to edit videos that are truly jaw dropping, you should download the desktop app. It's more than some basic video editing app, it's become a staple of amateur content creation for very good reason!

Downloading the CapCut video editor is pretty simple. Simply follow the link here to install it on your PC or Mac. There is also a mobile version on both android and ios devices. You can find it in the app store.
I recommend that you download both: 1st the mobile app first and then the PC/Mac app if you are serious about upping your video editing skills.
Now that you have the apps installed, let's look at some of the cool things you can do in CapCut and how. We're gonna look at the mobile app for now.
For reference, I am gonna be editing this scrapped video I took a while ago for a project back in high school. Now, I'm sure you have questions, I still have questions.
Why is my 17 year old snot-nosed self, fresh out of puberty, holding my poor saint of a dog who is wearing one of my nephews diapers? Well, I was working on a project for a business class I was taking, and one of my classmates was named Cooper.
Is the dog ok? Yes, her name was Rosie, and she was a very good sport. Well, fine is subjective because she passed away of old age last spring, about 6 years after this video. Don't be sad though; she lived a long and happy life full of naps, treats and belly rubs!
Will I elaborate on the project? No. No, I will not. You'll just think I'm either stupid or crazy. At 17, I was definitely both, with a lenience to the former.
@ch1cken_b0b I'm Testing Out How To Use CapCut Edits
♬ original sound - ChickenBob
How to Blur on CapCut
Let's say you want to blur sensitive info in your video. For example, you filmed a person without their knowledge and want to respect their privacy, or maybe you want to blur a random car's license plate. Or in my case, you don't want to be associated with such a strange video.
I will show you how I would blur their faces or really any sensitive media in this video via the mobile app.
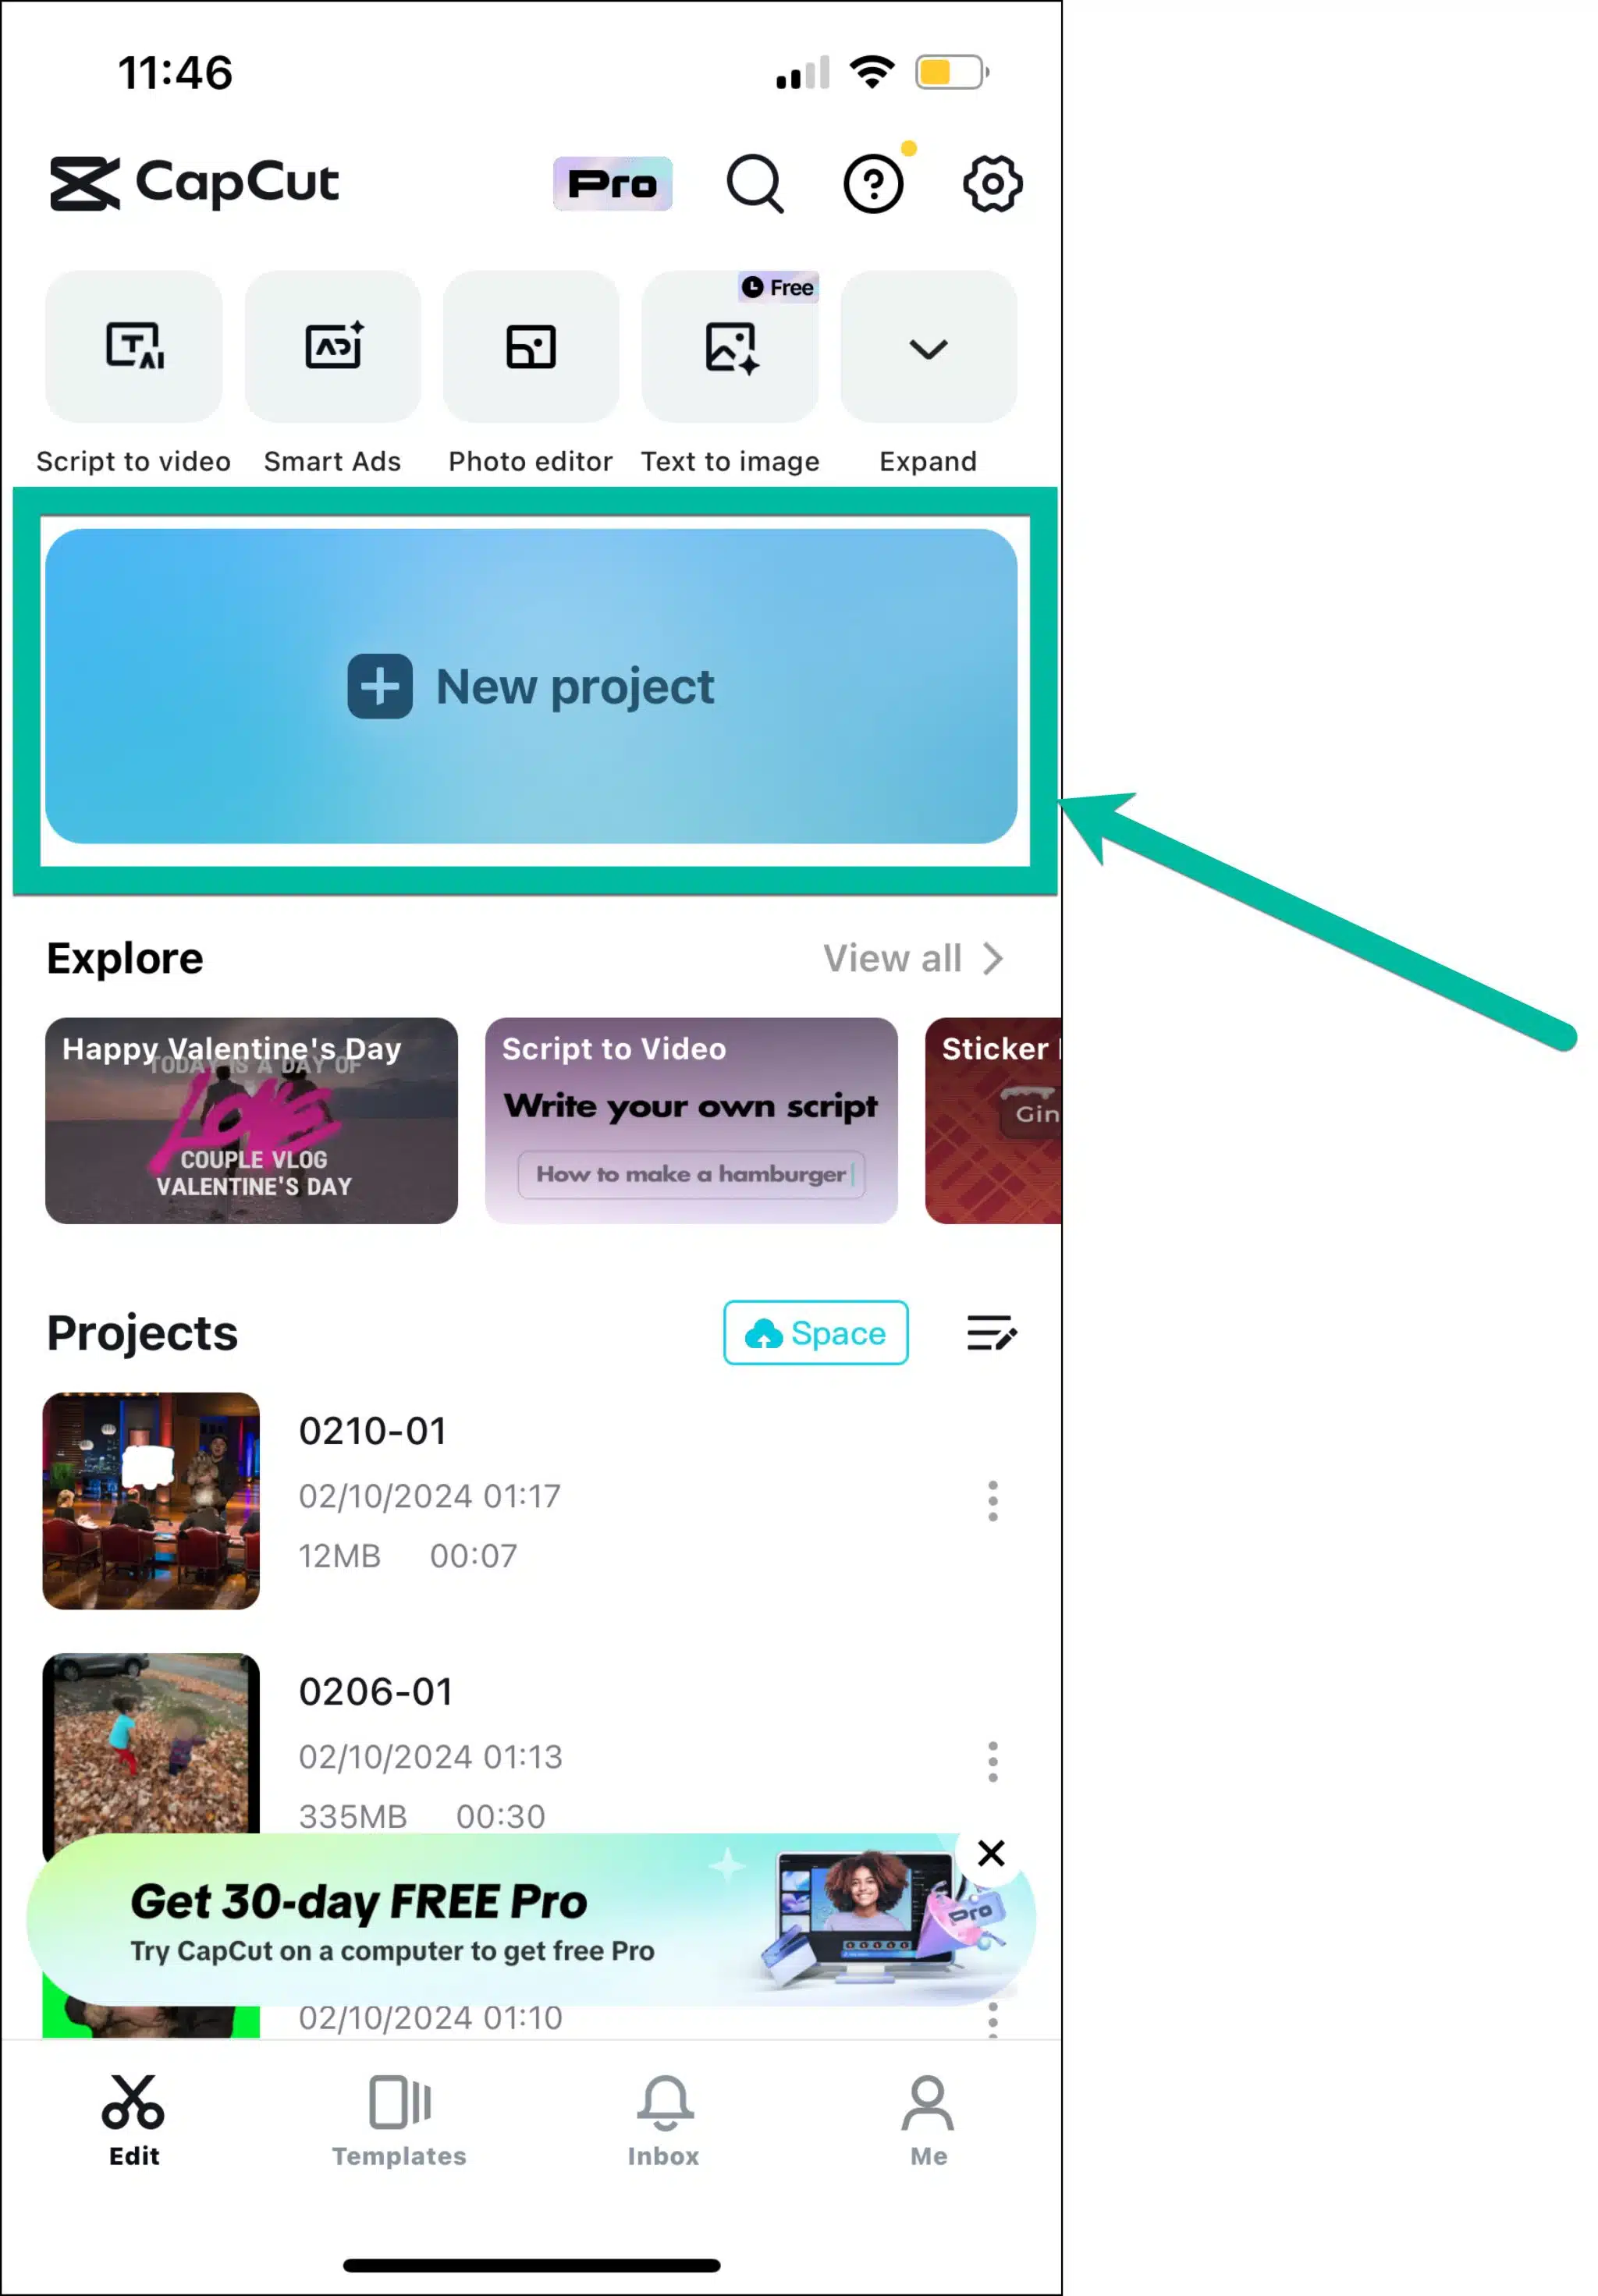
I'm writing these steps with the assumption you have the project already created. For reference, this is how you would do so.

Part 1: Apply Base Layer Blur
Tap Effects then Video Effects


Navigate to the Lens category and pick Blur. You can also manually look these up in the video effects search bar.

Drag the blur effect over the desired region (where/when you want to blur).

Now that the whole base layer is blurred out, we can now apply a mask layer.
Part 2: Apply Mask Layer
Navigate back to the main options.
Select Overlay and pick the same video you just uploaded. (it has the added tag).


Now select the video and scroll right on the toolbar until you find the Mask tool. Pick the shape and region of the blur. Then press Invert in the bottom left corner to have the blur sit just inside the shape.


From there, you should have the desired frames blurred as needed. This is my end result.
@ch1cken_b0b Testing Selective Blur
♬ original sound - ChickenBob
How to Make a Green Screen on CapCut
For this one, we are going to make a simple green screen template with uploaded clips and a green background. This one is going to be a vertical green screen so we will need a solid green 9:16 background.
Go online and get a 9:16 green screen image. Just a solid green background. Start a new project and select that green background image as the 1st layer.

Select Overlay and add the video you want to green screen.

Drag the 1st layer green screen to cover the range of your video.

Select the BG Remover tool and select Auto-Remove.

From there, you should have a green screen template for future use. See the one I just made and posted in TikTok!
How to Add Audio and Music to CapCut
This one is very straightforward. I should mention that CapCut comes with a massive library of music to add to your edits. You can use this technique to upload both audio and music to your CapCut account.
Download the desired music you want as an .mp4 file. I got some free music from YouTube's Audio Library.
Go into your desired project and select the Audio button that sits directly below the video file.


Select sounds. This will be the button with the TikTok logo. You will see a lot of premade sounds that don't require manual upload.
Select the file button. This is the one that looks like a folder. Select the option called Device.

Navigate to your desired .mp4 file and select it and press open.
Now you will see it is in the sounds menu. Select it.


Now it should play under the video as it runs. You can tailor it to change what portion of the music plays, its volume, etc. here is my end result.
How to Reverse a Video on CapCut
This one is very simple.
Select the video that you are working on.
Swipe right on the tool menu until you find the tool labeled reverse.
It will reverse the entire selected video, so make sure you split the video if you want to reverse only specific parts.

And now you can see the finished product. It's the same video just reversed so now I sound like I am speaking in some alien form of Russian.
How to Add Text on CapCut
This is a really simple but important feature. You can display text both through the entire duration of the video or at specific sections.
Select the video where you would like to insert text.
Select the add text button. This will produce a movable text box.

Use the text edit options to place it where you'd like and style it as you see fit.
select the range where you'd like the text box(es) to appear.

This is an example of what I did for mine.
How to Zoom In on CapCut
Follow these Simple Steps to implement zoom in your video.
Select Effects tool. Then select Video Effects.


Look up any of the Zoom effects and experiment with whichever looks best for you.
Toggle the Speed and Range of the Zoom as needed.
Drag the zoom about the desired frames of your video.
From there, you will have zoom sufficiently applied to your video. Here is an example of my zooming skills on TikTok.
How to Do Slow Motion on CapCut
This one is really goofy but also really fun. If you know how to apply "Slow Mo" you know how to manipulate any speeds.
Select the video you are editing.
Select the Speed tool, then select Normal (We'll get to the other one)


Adjust the speed to something below 1.0x speed as needed.
Play around with where and when you apply slow motion and how much you want to slow it down by.

This is the end result for applying slow motion onto my video.
How to Add Velocity on CapCut
Now let's say that you wanted to change the video speed multiple times in different ways throughout the clip. You would want to use this feature.
Select the video you are editing.
Select the Speed tool, then select Curve


There are some pre-made ones if that helps. Check to see if those are roughly what you need. Else make a new one.
Raise the point when you want to speed up the video, lower the points where you want to slow it down.


Play around with that until you got it exactly as you need it. I just did some experimentation with it in my original clip and uploaded it to TikTok. If the default 5 dots (or beats) is too much for you, then simply press the + Add beat button to add it to the frame where you'd like. Alternatively, if you want to get rid of a beat, simply tap on said beat and press the white button again, it should say - Remove beat.
How to Use Chroma Key in CapCut
This one requires you to have a green screen video uploaded so go and see my tutorial on that from before.
Start a New Project and add the image of video you want to put the green screen footage into.

From the main tools, select Overlay -> Add Overlay.
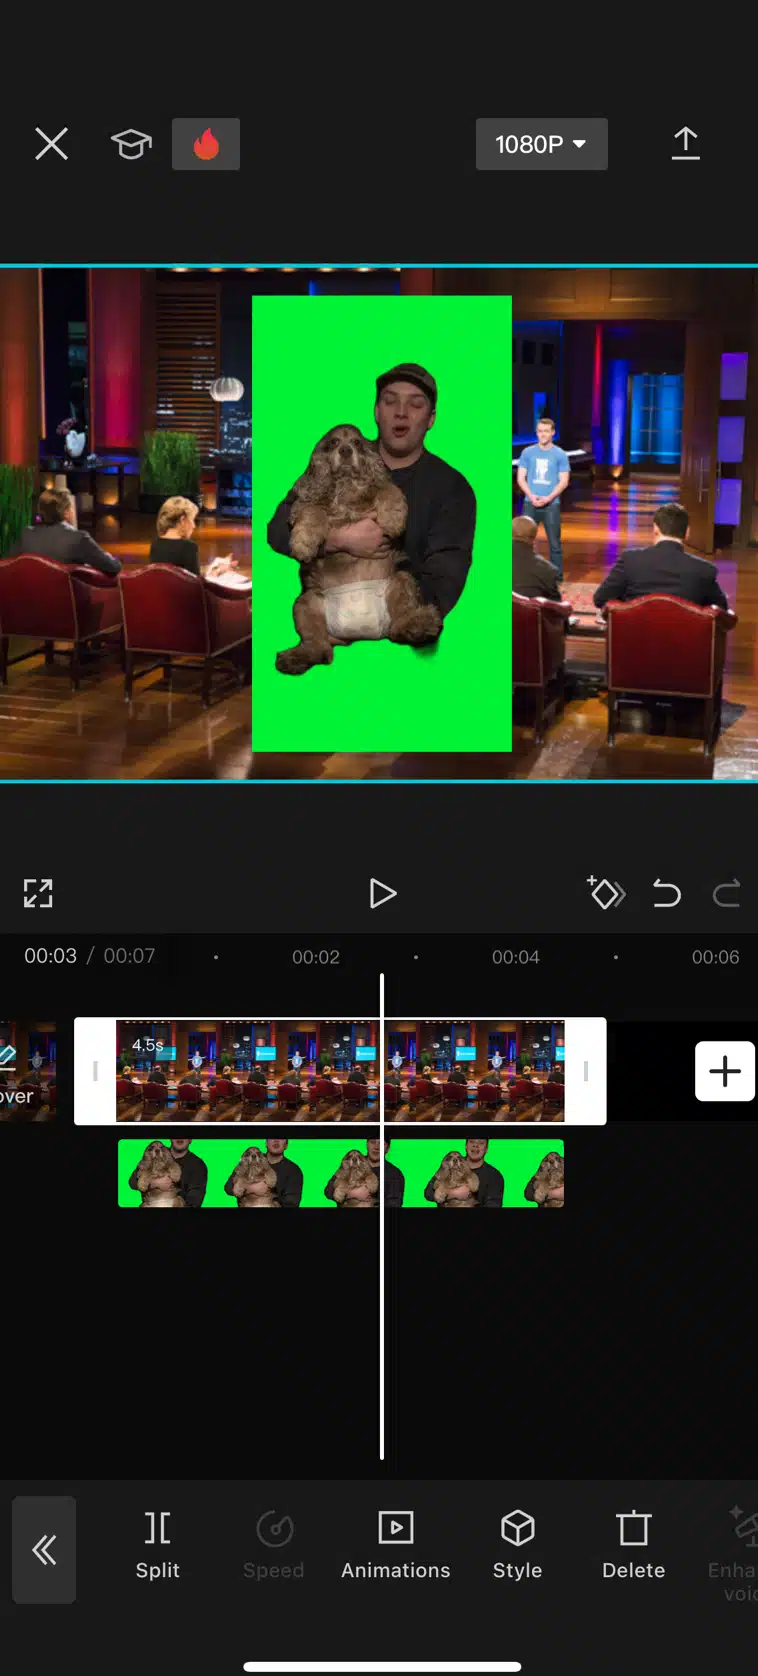
Select the green screen video. Move and resize the back as needed.


Now click on the video and scroll right until you find the BG Remover tool.

Click on the button to the right called Chroma Key.
Move the circle over the green portion and select Intensity.
Set the bar to 100% and the green screen should disappear but leave the video.


I used this technique to put myself into an episode of my favorite gameshow, Shark Tank!
@ch1cken_b0b #CapCut ♬ Heavy and epic cinematic background music for advertising.(1147796) - Platinum Notes
How to Draw on CapCut
If you noticed, I did also use drawing in the video, and I'll show you how you can implement that now.
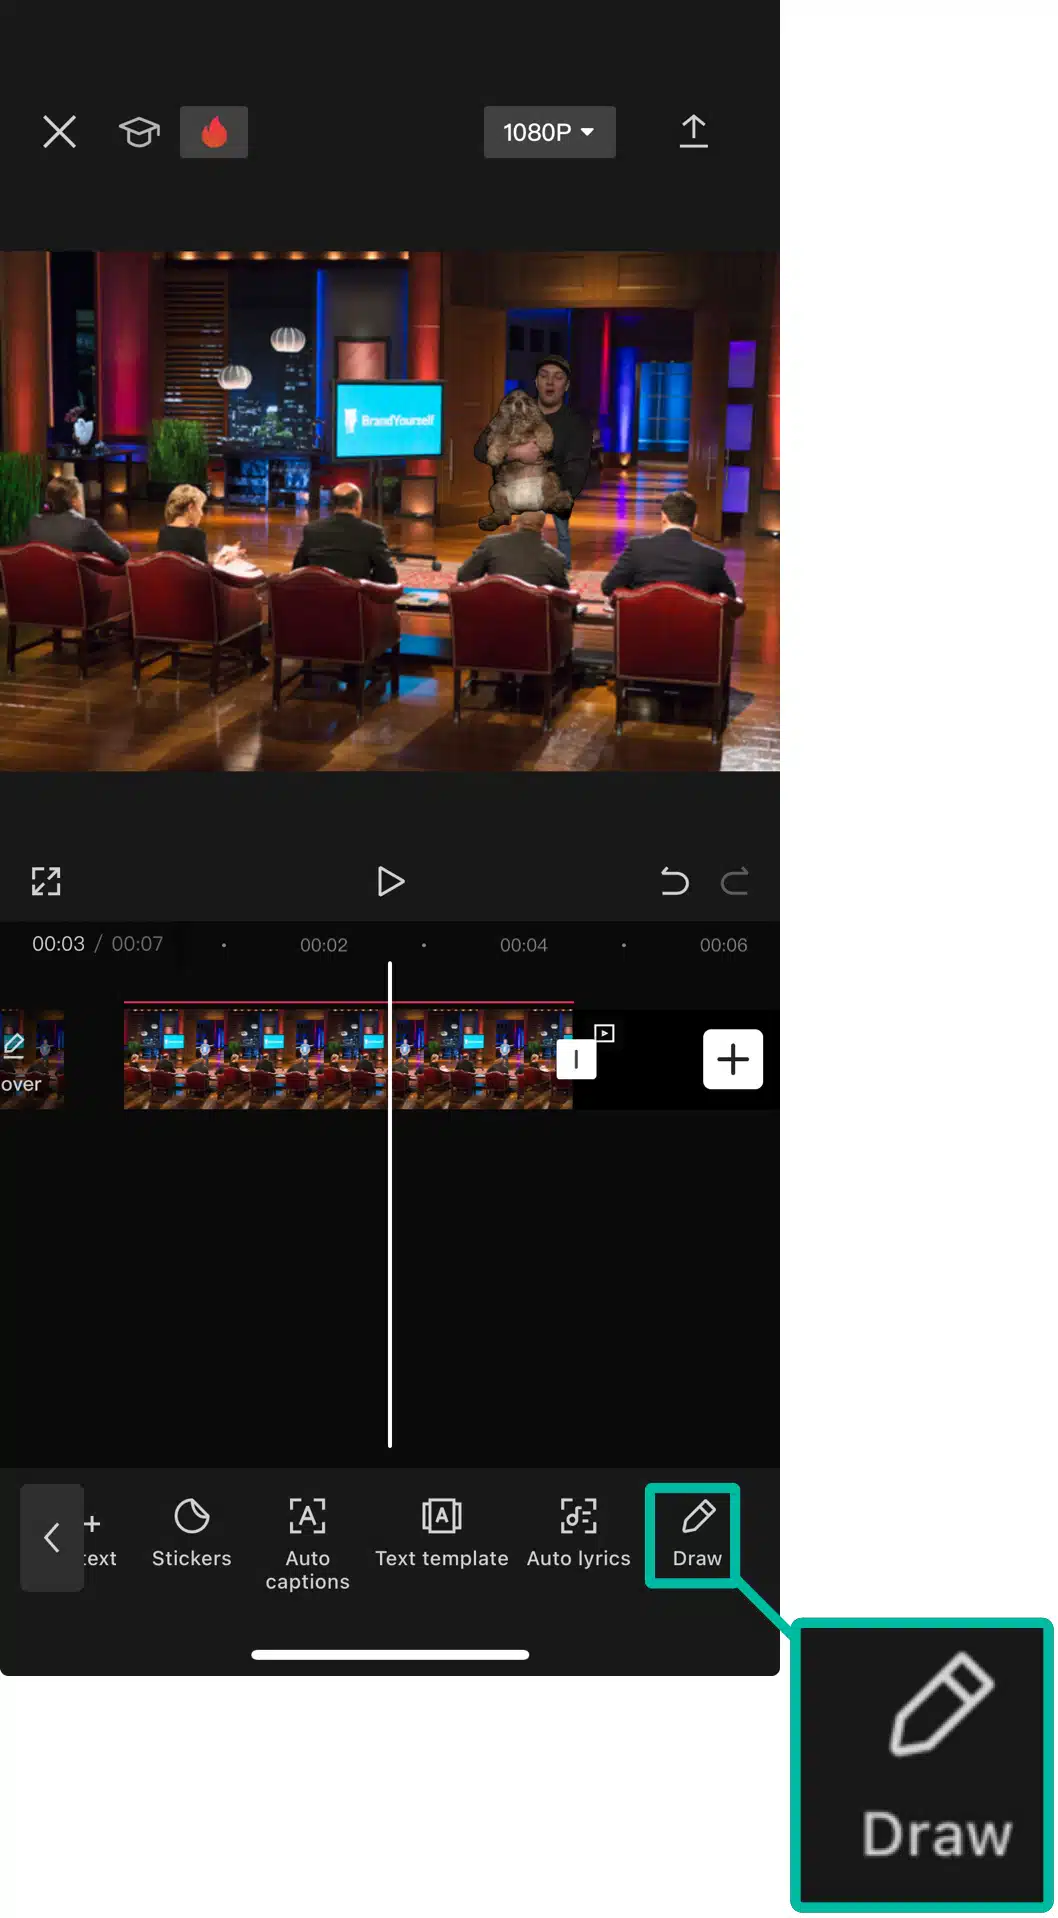
In the main tool menu, select Text.
On the far right, you will see an option titled Draw.


Select the color and style of your drawing. Then, drag the drawing across the range of where you would like it to appear.

Its as simple as that! Here is the end result of that video I did + a little drawing. I just drew a smiley face but you get the idea.
@ch1cken_b0b #CapCut ♬ Heavy and epic cinematic background music for advertising.(1147796) - Platinum Notes
How to Add Caption on CapCut
This last tool will also be found in the Text menu. It will generate captions for your video so that people can see whats being said. I see this a lot on TikTok, especially with video clips.
In the main tool menu, select Text then Captions.


Here you have a pretty large library of caption templates to choose from, even more if you have the premium version. Click Video and then Generate.


Edit the caption so that it's as accurate as possible. It will ignore things like symbols and punctuation, so you will usually need to manually edit it. That's also nice if you are trying to censor stuff out later (ie TikTok swearing policies may restrict your reach.) and avoid the dreaded shadow-ban on TikTok.. Then you can place and style the captions as needed.

It's a bit tedious to edit captions at scale, but it's definitely important to do. It is very important to implement for certain platforms that have policies about language that you can and cannot use (ie swearing, hate speech, incitement of violence, etc.). If and when you have content to edit that contains said, language, you will want the ability to manipulate the captions to censor said language.
@ch1cken_b0b #CapCut ♬ Heavy and epic cinematic background music for advertising.(1147796) - Platinum Notes
If you have read through this entire article and reached this point, you know enough to hit the ground running in CapCut. I use it in my day to day life as a video editor and part time content creator, and hopefully you can too, now! I am working on a video format for this same tutorial, so stay posted and keep your eye on the newsletter!
Did I miss any tips or tricks? I wanna know! Like I said, I am working on a master tutorial video and could use all the input I can get! Please tell me your tips and tricks in the comments below!

